Deploy Jenkins on Kubernetes is one of the most common setups for DevOps and homelab users. In this guide, I’ll show you step by step how I did it.
This week it was raining 🌧️ so I couldn’t go outside. Instead, I decided to learn something new and try deploying Jenkins in my homelab Kubernetes cluster.
The code used in this tutorial can be found on my GitHub.
Step 1: Create a Namespace for Jenkins on Kubernetes
First, we create a namespace where Jenkins will run.
apiVersion: v1
kind: Namespace
metadata:
  name: devops-tools
  labels:
    name: devops-tools
Step 2: Create Persistent Volume Claim (PVC)
Jenkins needs persistent storage so that data is not lost when the pod restarts or gets deleted. I already wrote a post about setting up NFS Persistent Volume in Kubernetes, make sure you check it out if you are new.
Here is the PVC manifest:
apiVersion: v1
kind: PersistentVolumeClaim
metadata:
  name: jenkins-pv-claim
  namespace: devops-tools
spec:
  accessModes:
    - ReadWriteOnce
  storageClassName: nfs-csi
  resources:
    requests:
      storage: 5Gi
Step 3: Create ServiceAccount and RBAC
Jenkins needs permissions to create pods, deployments, and other Kubernetes resources. We do this by creating a ServiceAccount, Role, and RoleBinding.
apiVersion: v1
kind: ServiceAccount
metadata:
  name: jenkins
  namespace: jenkins-build
---
apiVersion: rbac.authorization.k8s.io/v1
kind: Role
metadata:
  name: jenkins-runner
  namespace: jenkins-build
rules:
  - apiGroups: [""]
    resources: ["pods", "services", "configmaps", "secrets"]
    verbs: ["get", "list", "watch", "create", "update", "patch", "delete"]
  - apiGroups: ["apps"]
    resources: ["deployments", "replicasets", "statefulsets"]
    verbs: ["get", "list", "watch", "create", "update", "patch", "delete"]
---
apiVersion: rbac.authorization.k8s.io/v1
kind: RoleBinding
metadata:
  name: jenkins-runner-binding
  namespace: jenkins-build
subjects:
  - kind: ServiceAccount
    name: jenkins
    namespace: jenkins-build
roleRef:
  apiGroup: rbac.authorization.k8s.io
  kind: Role
  name: jenkins-runner
Step 4: Create Jenkins Deployment
Now we deploy Jenkins. This manifest will mount the PVC, use the ServiceAccount we created, and set resource limits.
apiVersion: apps/v1
kind: Deployment
metadata:
  name: jenkins
  namespace: devops-tools
spec:
  replicas: 1
  selector:
    matchLabels:
      app: jenkins-server
  strategy:
    type: Recreate
  template:
    metadata:
      labels:
        app: jenkins-server
    spec:
      securityContext:
            fsGroup: 1000
            runAsUser: 1000
      serviceAccountName: jenkins
      containers:
        - name: jenkins
          image: jenkins/jenkins:lts
          imagePullPolicy: Always
          resources:
            limits:
              memory: "2Gi"
              cpu: "1000m"
            requests:
              memory: "500Mi"
              cpu: "500m"
          ports:
            - name: httpport
              containerPort: 8080
            - name: jnlpport
              containerPort: 50000
          livenessProbe:
            httpGet:
              path: "/login"
              port: 8080
            initialDelaySeconds: 90
            periodSeconds: 10
            timeoutSeconds: 5
            failureThreshold: 5
          readinessProbe:
            httpGet:
              path: "/login"
              port: 8080
            initialDelaySeconds: 60
            periodSeconds: 10
            timeoutSeconds: 5
            failureThreshold: 3
          volumeMounts:
            - name: jenkins-data
              mountPath: /var/jenkins_home
      volumes:
        - name: jenkins-data
          persistentVolumeClaim:
              claimName: jenkins-pv-claim
Check deployment status:
kubectl get deploy jenkins -n devops-toolsStep 5: Create a Service
The service allows us to access Jenkins. I’m using ClusterIP since I already have an ingress controller. If you don’t have one, you can use NodePort.
apiVersion: v1
kind: Service
metadata:
  name: jenkins-service
  namespace: devops-tools
  annotations:
      prometheus.io/scrape: 'true'
      prometheus.io/path:   /
      prometheus.io/port:   '8080'
spec:
  selector:
    app: jenkins-server
  ports:
    - protocol: TCP
      port: 8080
      targetPort: 8080
  type: ClusterIP
Step 6: Create an Ingress
Finally, we expose Jenkins using Ingress.
apiVersion: networking.k8s.io/v1
kind: Ingress
metadata:
  name: jenkins-ingress
  namespace: devops-tools
spec:
  ingressClassName: nginx
  rules:
  - host: jenkins.homelab.local
    http:
      paths:
      - backend:
          service:
            name: jenkins-service
            port:
              number: 8080
        path: /
        pathType: Prefix
Now update your DNS server (or /etc/hosts) to point jenkins.homelab.local to your ingress controller IP.
Get the ingress IP with:
k get svc -n ingress-nginx ingress-nginx-controller -o=jsonpath='{.status.loadBalancer.ingress[].ip}'Step 7: Access Jenkins
Open the URL in your browser:
http://jenkins.homelab.localVoila 😍
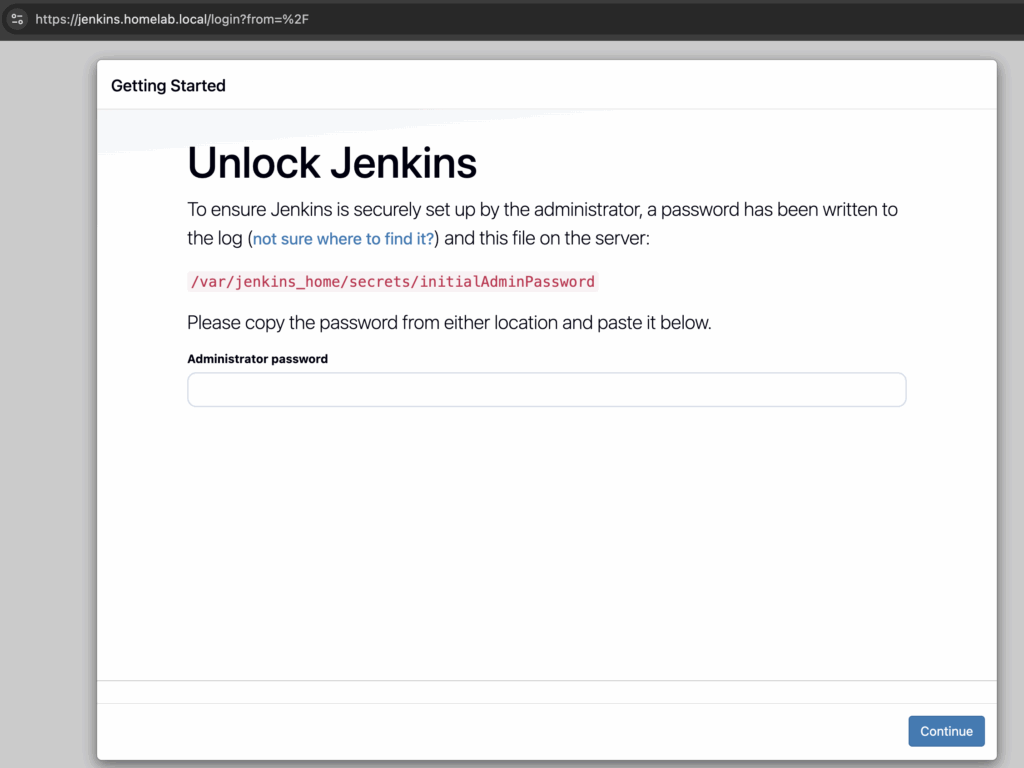
When Jenkins starts, it will ask for an unlock key. Get it with:

Done!
Now you can log in, install plugins, and start building pipelines in your Kubernetes Jenkins setup.
enjoy 😉
Final Thoughts
Running Jenkins on Kubernetes is a great way to practice DevOps skills in your homelab. With persistent storage, RBAC, and ingress, this setup is close to production ready.
If you found this tutorial helpful, share it with others who want to learn how to deploy Jenkins on Kubernetes.